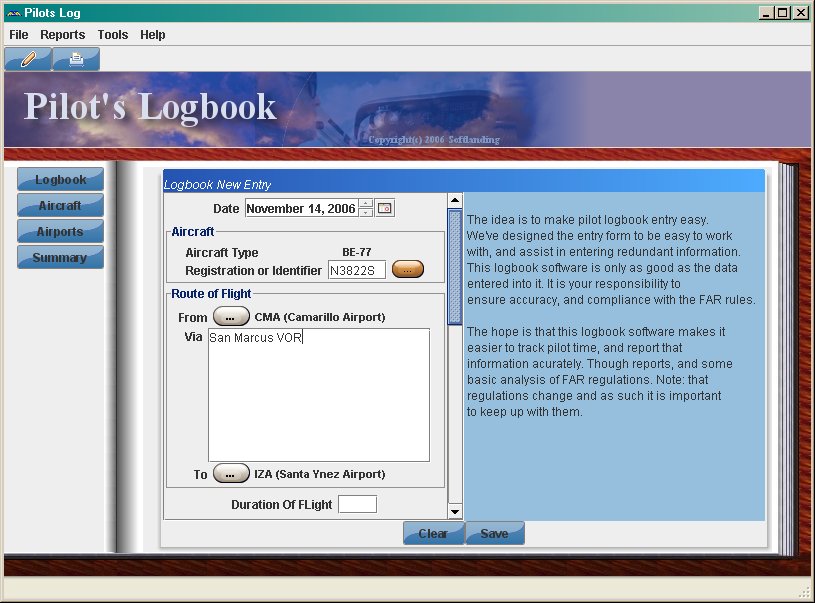
To start entering flights into your log book you click on the "pencil" icon on the menu bar and this pops-up the log book entry dialog. Enter your flight information and press the "save" button. There is basic validation that happens when you update so that you don't enter invalid information about a flight. NOTE: If you do not click the save button and you leave the screen all your information will be lost. So before leaving the new logbook entry screen click save. There is always the edit function and delete function in the main logbook view to make changes or delete an entry later.
The first section deals with the date the flight took place, the aircraft, the departure and destination, and enroute portions. The enroute can also be used to make comments about the flight. The final entry is for the duration of the entire flight.
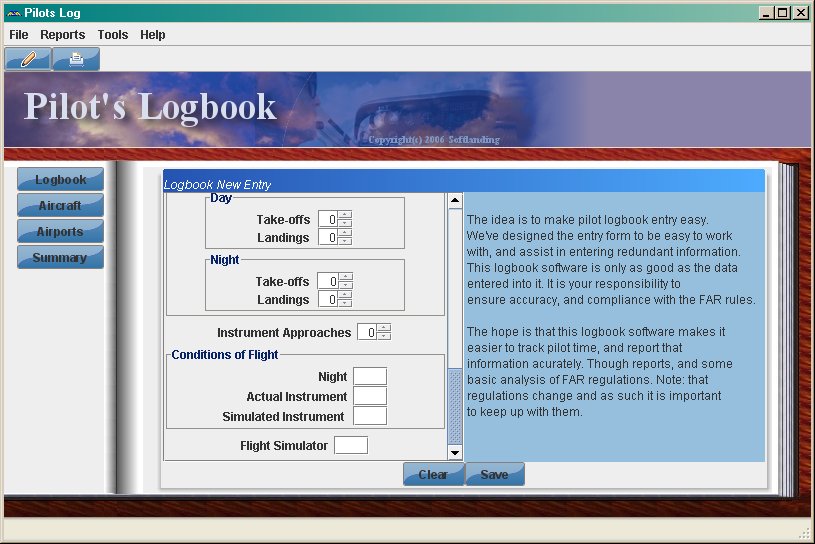
The type of pilot time information is important for breaking out flying time for the FAA 8710 form. This information is important. If you are unsure of what each of the entries mean check with your instructor or the FAR regulations.
The buttons next to each field simply make it easy to prefill from the total flight duration. This information can be manually entered if so choosen, but if the time is the same as the total flight duration, the one button click entry makes it quicker.

The logging of landings and take offs both day and night helps in determining night currency, as you need 3 take off and landings at night within 90 days to maintain your night currency. The other reasons for tracking day landings is to show currency for other portions of the FAR regulations, but in terms of this program they are not used for any analysis other than reporting.
The conditions of flight are important for portions of instrument currency, and also some night currency tracking.
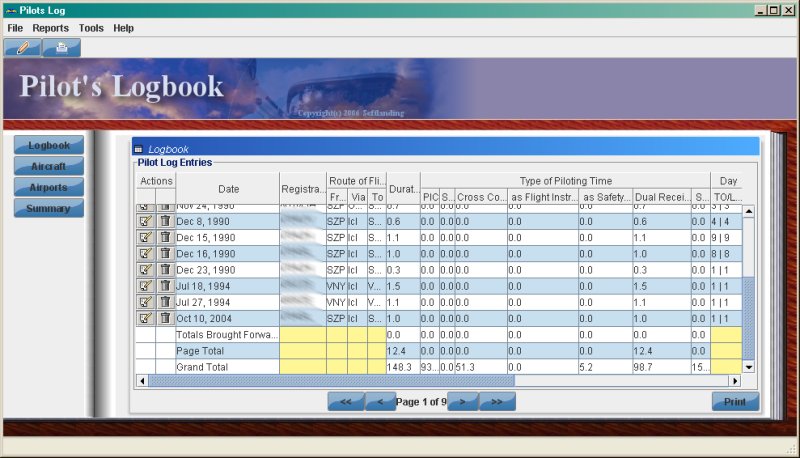
When the logbook launches the default view is a table view of the logbook, or if the "Logbook" button on the left page is clicked this view will be called up. The number of log entries displayed per page is controlled through the Tools->Configuration menu. If you change he number of entries per page this will take affect the next time the application starts up. The table view is set up to a "Jeppesen" like view, as far as the column headings are concerned. There are brought "forward totals" and "page totals" at the bottom of each page, and a "grand total". The calculations are already done for you which is a nice feature not in paper based logbooks. The buttons at the bottom of this view allow paging through the logbook. The print button, also located at the bottom of this view is used to print the current page. If you want to print the entire logbook you print using the printer button icon next to the "pencil" icon to add a new log entry.